ATI Radeon 7000 Mac ROM Flashing
The ATI Radeon 7000 is a desireable card because it allows the use of DVI all the way back to System 7. ATI shipped a ROM that included ndrv resources, which are what the Mac ROM uses to load drivers to use the display at boot.
The Radeon 7000 was available for both the PC and the Mac, and of course the PC version had much greater production numbers so are both easier and cheaper to get ahold of. The concept of flashing a Mac ROM into a PC card isn't new or original, although it has some gotchas and most of the information I found on the subject is from the time when these cards were relatively modern. This page serves as my notes on the subject.
32MB vs. 64MB
The r7k came in 32MB and 64MB varieties. The only real and for true Mac Editions I've come across are 32MB versions. The 32MB version has a terrible failure mode with larger DVI-D displays. Specifically, it appears to willingly use the highest resolution the display advertises, even if the card can't actually display that resolution. With a Dell U2410, the 32MB version will gladly attempt to use 1900x1200, and display nothing. A black screen. If you have a 2nd graphics adapter, or another means of changing resolutions in such a situation, you can adjust the resolution down in the Monitors Control Panel. However, in the case of the Dell U2410, the next highest resolution is 1600x1200, which is again beyond the capabilities of the card, and then it drops down into the 1200x1024 range.
However, if you connect a 20" display, such as a Dell 2007wfp, the card works great at 1600x1080. Which is good, but it'd really be much better to not have to downgrade my display.
The 64MB version is capable of 1900x1200 on a 24" display, and works great.
Flashing difficulties
There are a couple gotchas with the flashing process:
Most (but not all) PC cards come with a 64KB flash ROM. The Mac ROM is 128KB.
- One option is to edit out the ndrv resources (again, this makes the machine not usable in firmware, it will only work after boot when the drivers load), in order to get the ROM size down to 64KB. Not great, particularly if you're using the card as a primary head.
- Another option is to remove the 64KB ROM and replace it with a 128KB ROM. This is a little tricky, 1) because the flash chip is so small, and 2) you need to get a flash chip that the ATI ROM flashing tools understand how to write to.
I went with the latter option and replaced the flash chip with M25P10-AV chips from digikey. Having never worked with SOIC-8 packages before, it took me a while to figure out orientation. There is no circle marking Pin 1, despite the markings in the datasheet. Instead, one edge is slightly slanted, and the other is sharper. On the slanted edge, orient that to the left, and now pin 1 is on the top left corner.
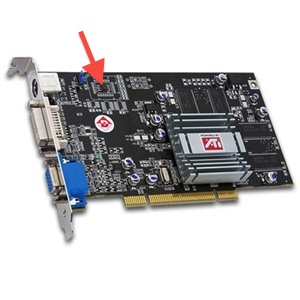
FWIW, I'm using a Sapphire Radeon 7000.
Files:
These are files collected from elsewhere.
62-flashrm2new.zip This is the package I used to flash the chip. It includes the full 128k Mac ROM version 208, which is the last available and works well on my displays. This is a DOS utility, and I just used a freedos install CD. The utility can be used as follows:
flashrom -iThis will display a list of detected cards, along with a "slot number", which is passed to subsequent commands, in the case of multiple cards being found. If this hangs your machine, you installed the flash incorrectly, try again!
flashrom -s # filename.binThis will save whatever the previous contents of flash were to filename.bin. Optionally, pass a size in KB following the filename. It defaults to 32KB, which isn't very useful:
flashrom -s # filename.bin 128
flashrom -pm # m208full.binThis will program the file for a Mac system (pm vs p).
Mac ROM 208 Updater In theory this tool under OS9.1 or higher should work to flash the ROM as well. I only tried the PC flasher.
ATI Drivers for Mac OS A page with lots of ATI drivers and firmware for MacOS. Updated August 18 2012